About the presenter
Presenter Name
☁️ Presenter Title
For questions or help with this series: msusdev@microsoft.com
All demos and source code available on GitHub:
Series road map
- Session 1:
- ↪️ Introduction to Azure Pipelines
- Session 2:
- Automatically build and test your code with Azure Pipelines
- Session 3:
- Deploy your code to Azure with Azure Pipelines
Today’s agenda
- What are Azure Pipelines?
- Learn the YAML syntax
- Building a simple project
::: notes
Learn how Azure Pipelines enable you to automate your software development cycle for code hosted in GitHub. We’ll walk you through using everyday actions in your first pipeline. You’ll learn how to:
- Create a pipeline
- Add actions to a pipeline
- Trigger the pipeline
:::
Azure Pipelines
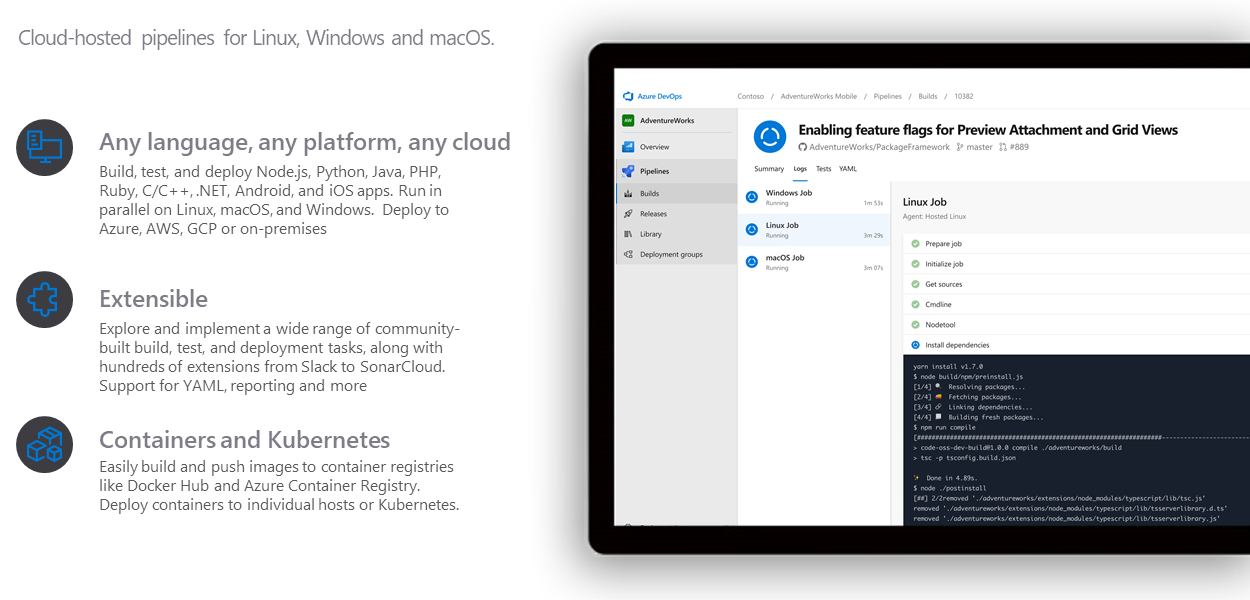
What are Azure Pipelines?
- Packaged pipelines
- Automates common build, test, and deployment actions
- Highly configurable and extendable
- Supports an open marketplace of free and paid tools
- Includes a rich user interface system native in Azure DevOps
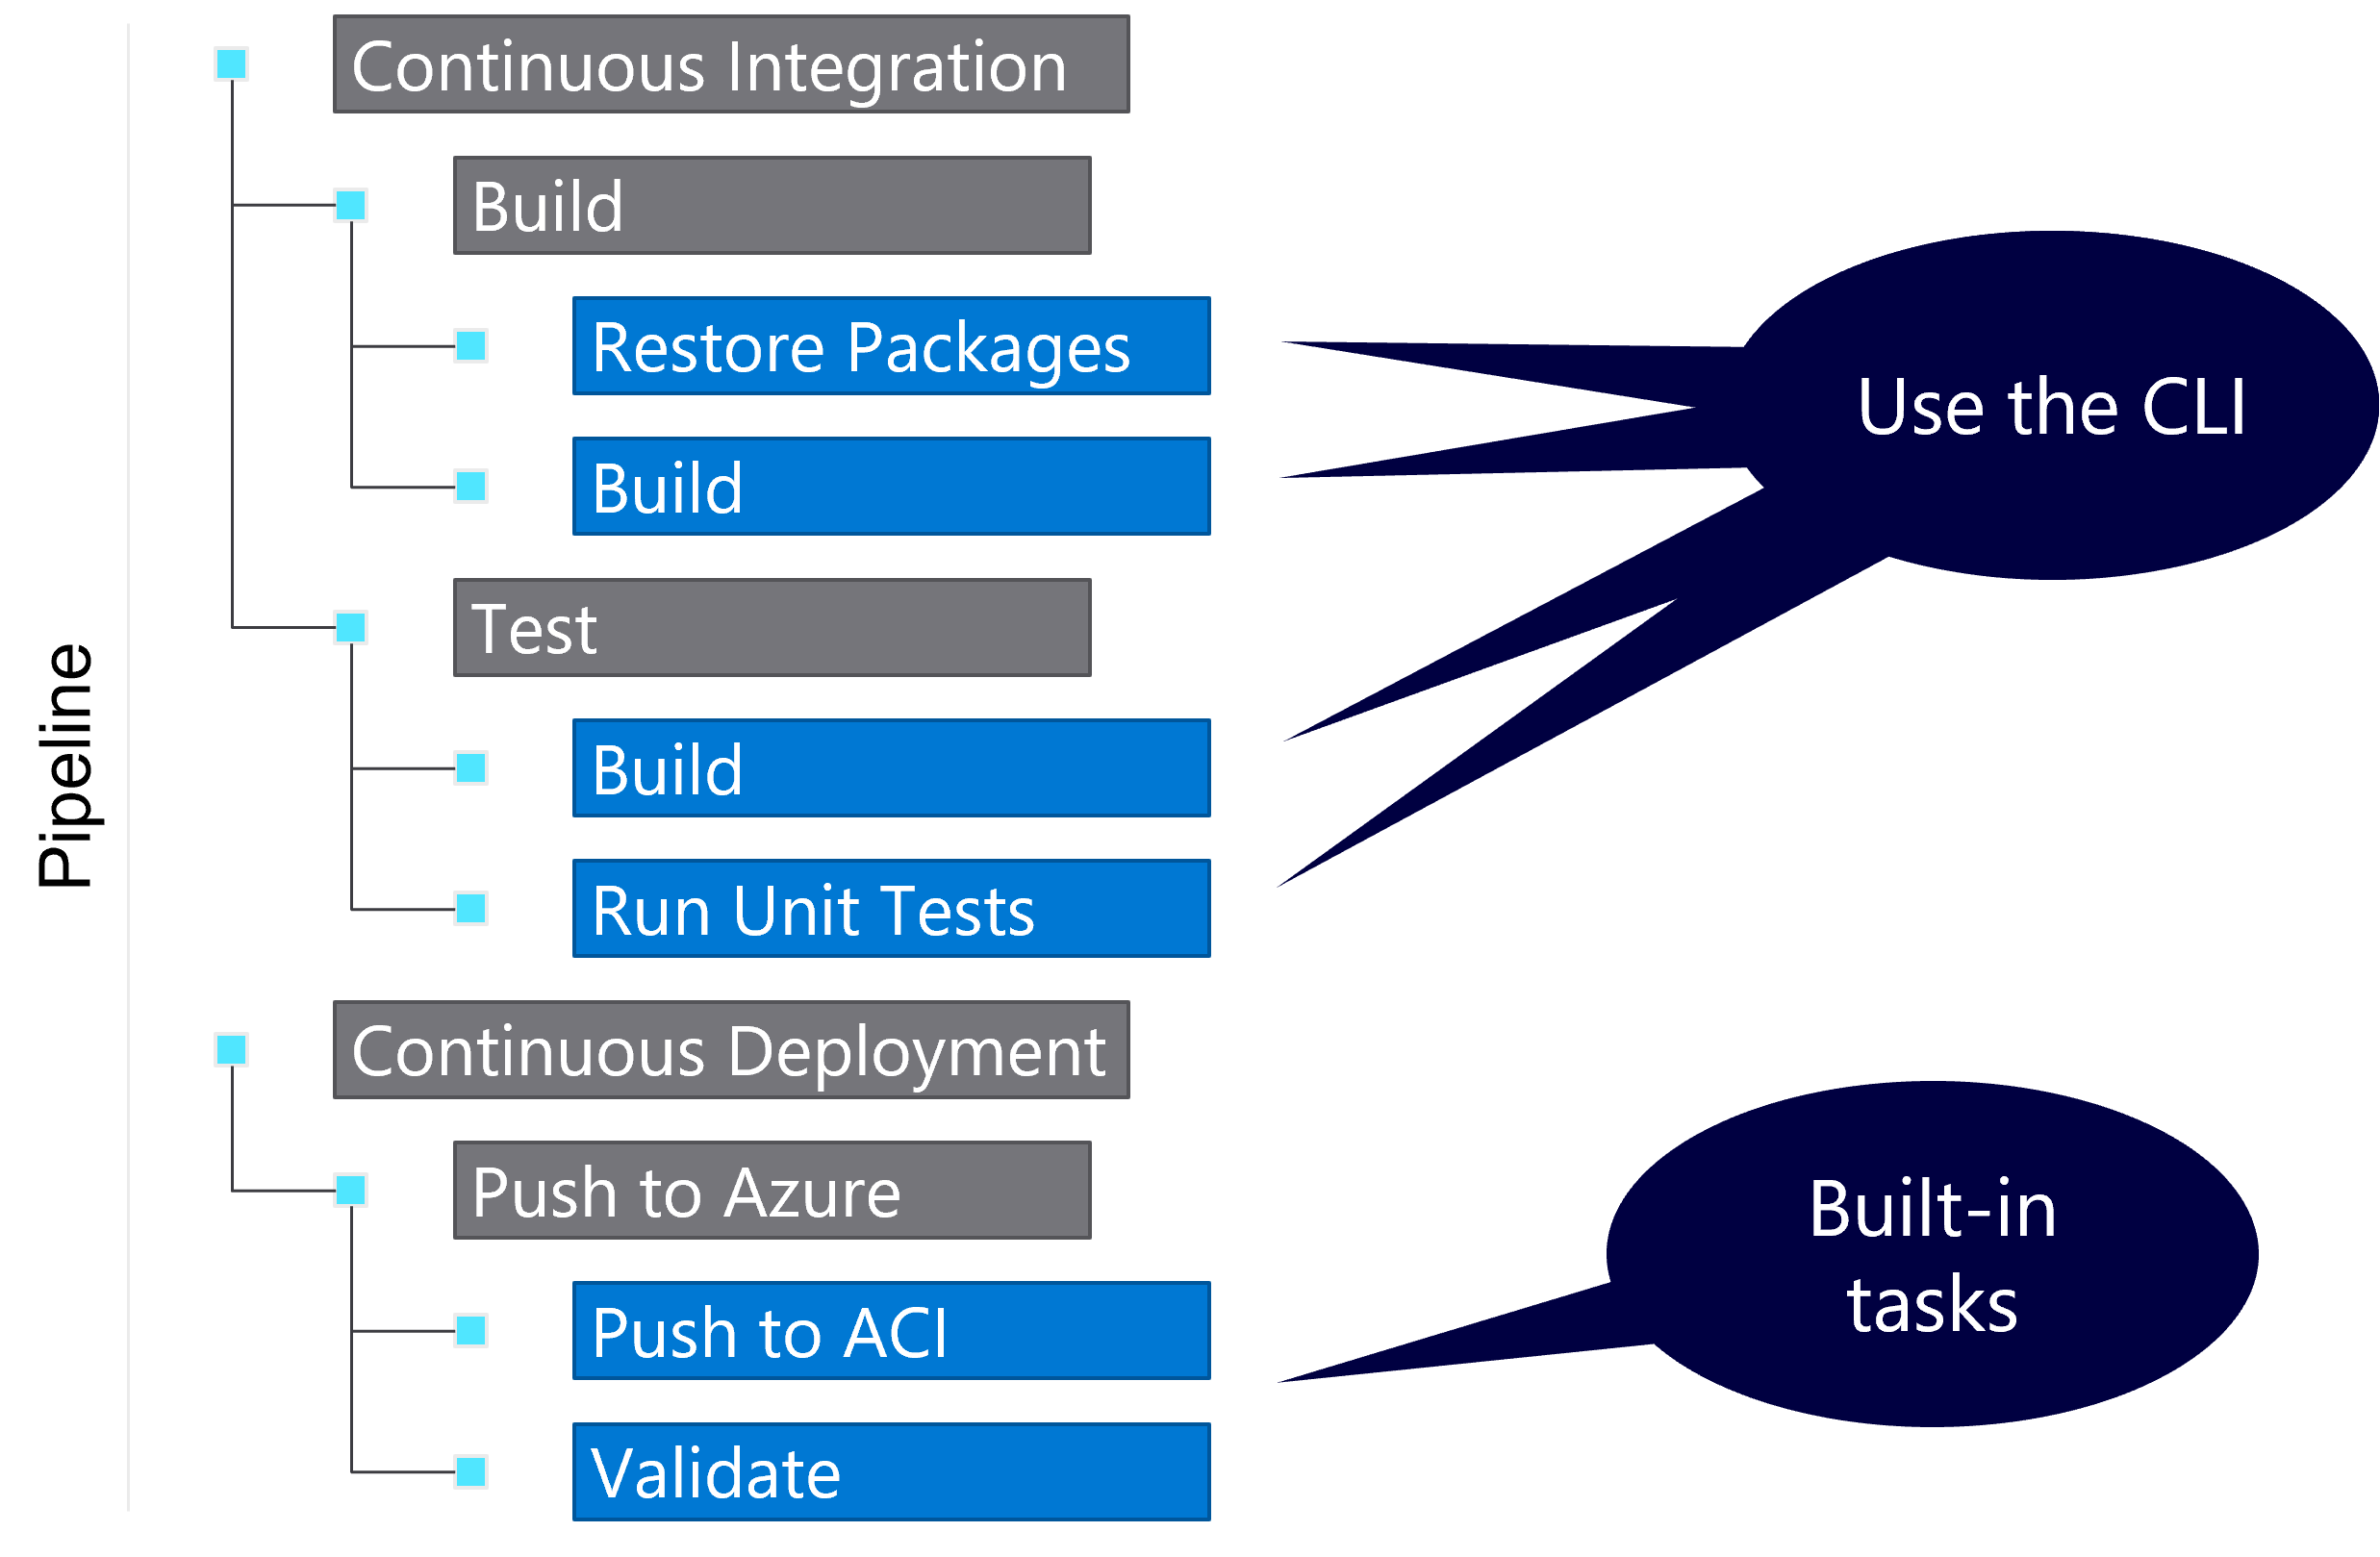
Anatomy of a pipeline
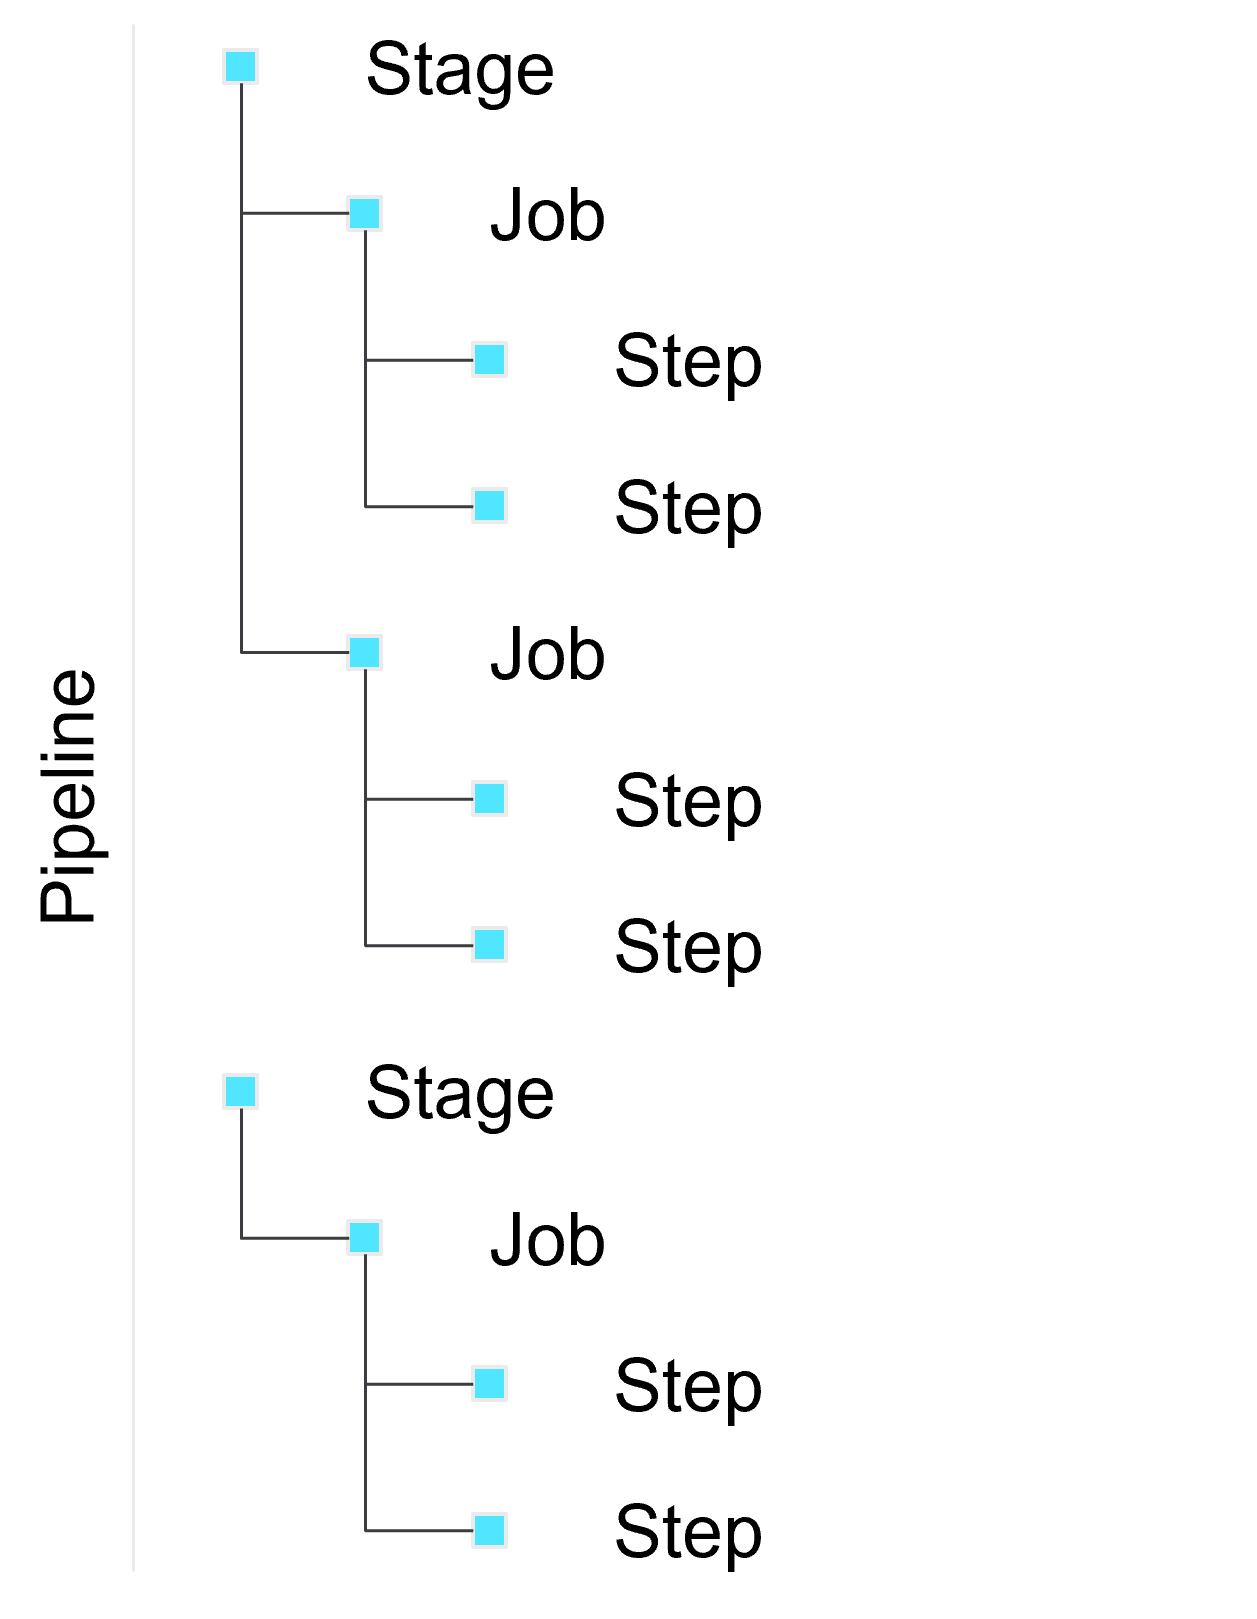
Stages
Jobs
Steps
Types of steps
Script
- Run any command-line script
- Example:
echo 'Hello World'
Task
- Run one of the built-in complex tasks
- Example:
- Publish to Azure
Demo: Building a project with a starter pipeline
::: notes
-
Start with an empty Azure DevOps project
-
Create a GitHub repository with a single README file
-
Use Visual Studio Code to create a new .NET console application with the following commands and code:
 dotnet new console
 dotnet add package Colorful.Console
 dotnet new gitignore
 dotnet new sln
 dotnet sln add <name-of-project-folder>.csproj
using static System.Drawing.Color; using Console = Colorful.Console; Console.WriteAscii("Hello, World!", Red);dotnet runNote: You can use GitHub Codespaces to perform this task quickly.
-
Commit your changes to the local repository and push the changes to GitHub.
-
Return to the new Azure DevOps project.
-
Create, save, and then run a new pipeline with the following settings:
- Source: GitHub
- Repository: Select GitHub repository you created earlier
- Template: .NET Desktop
-
Observe the job output logs.
:::
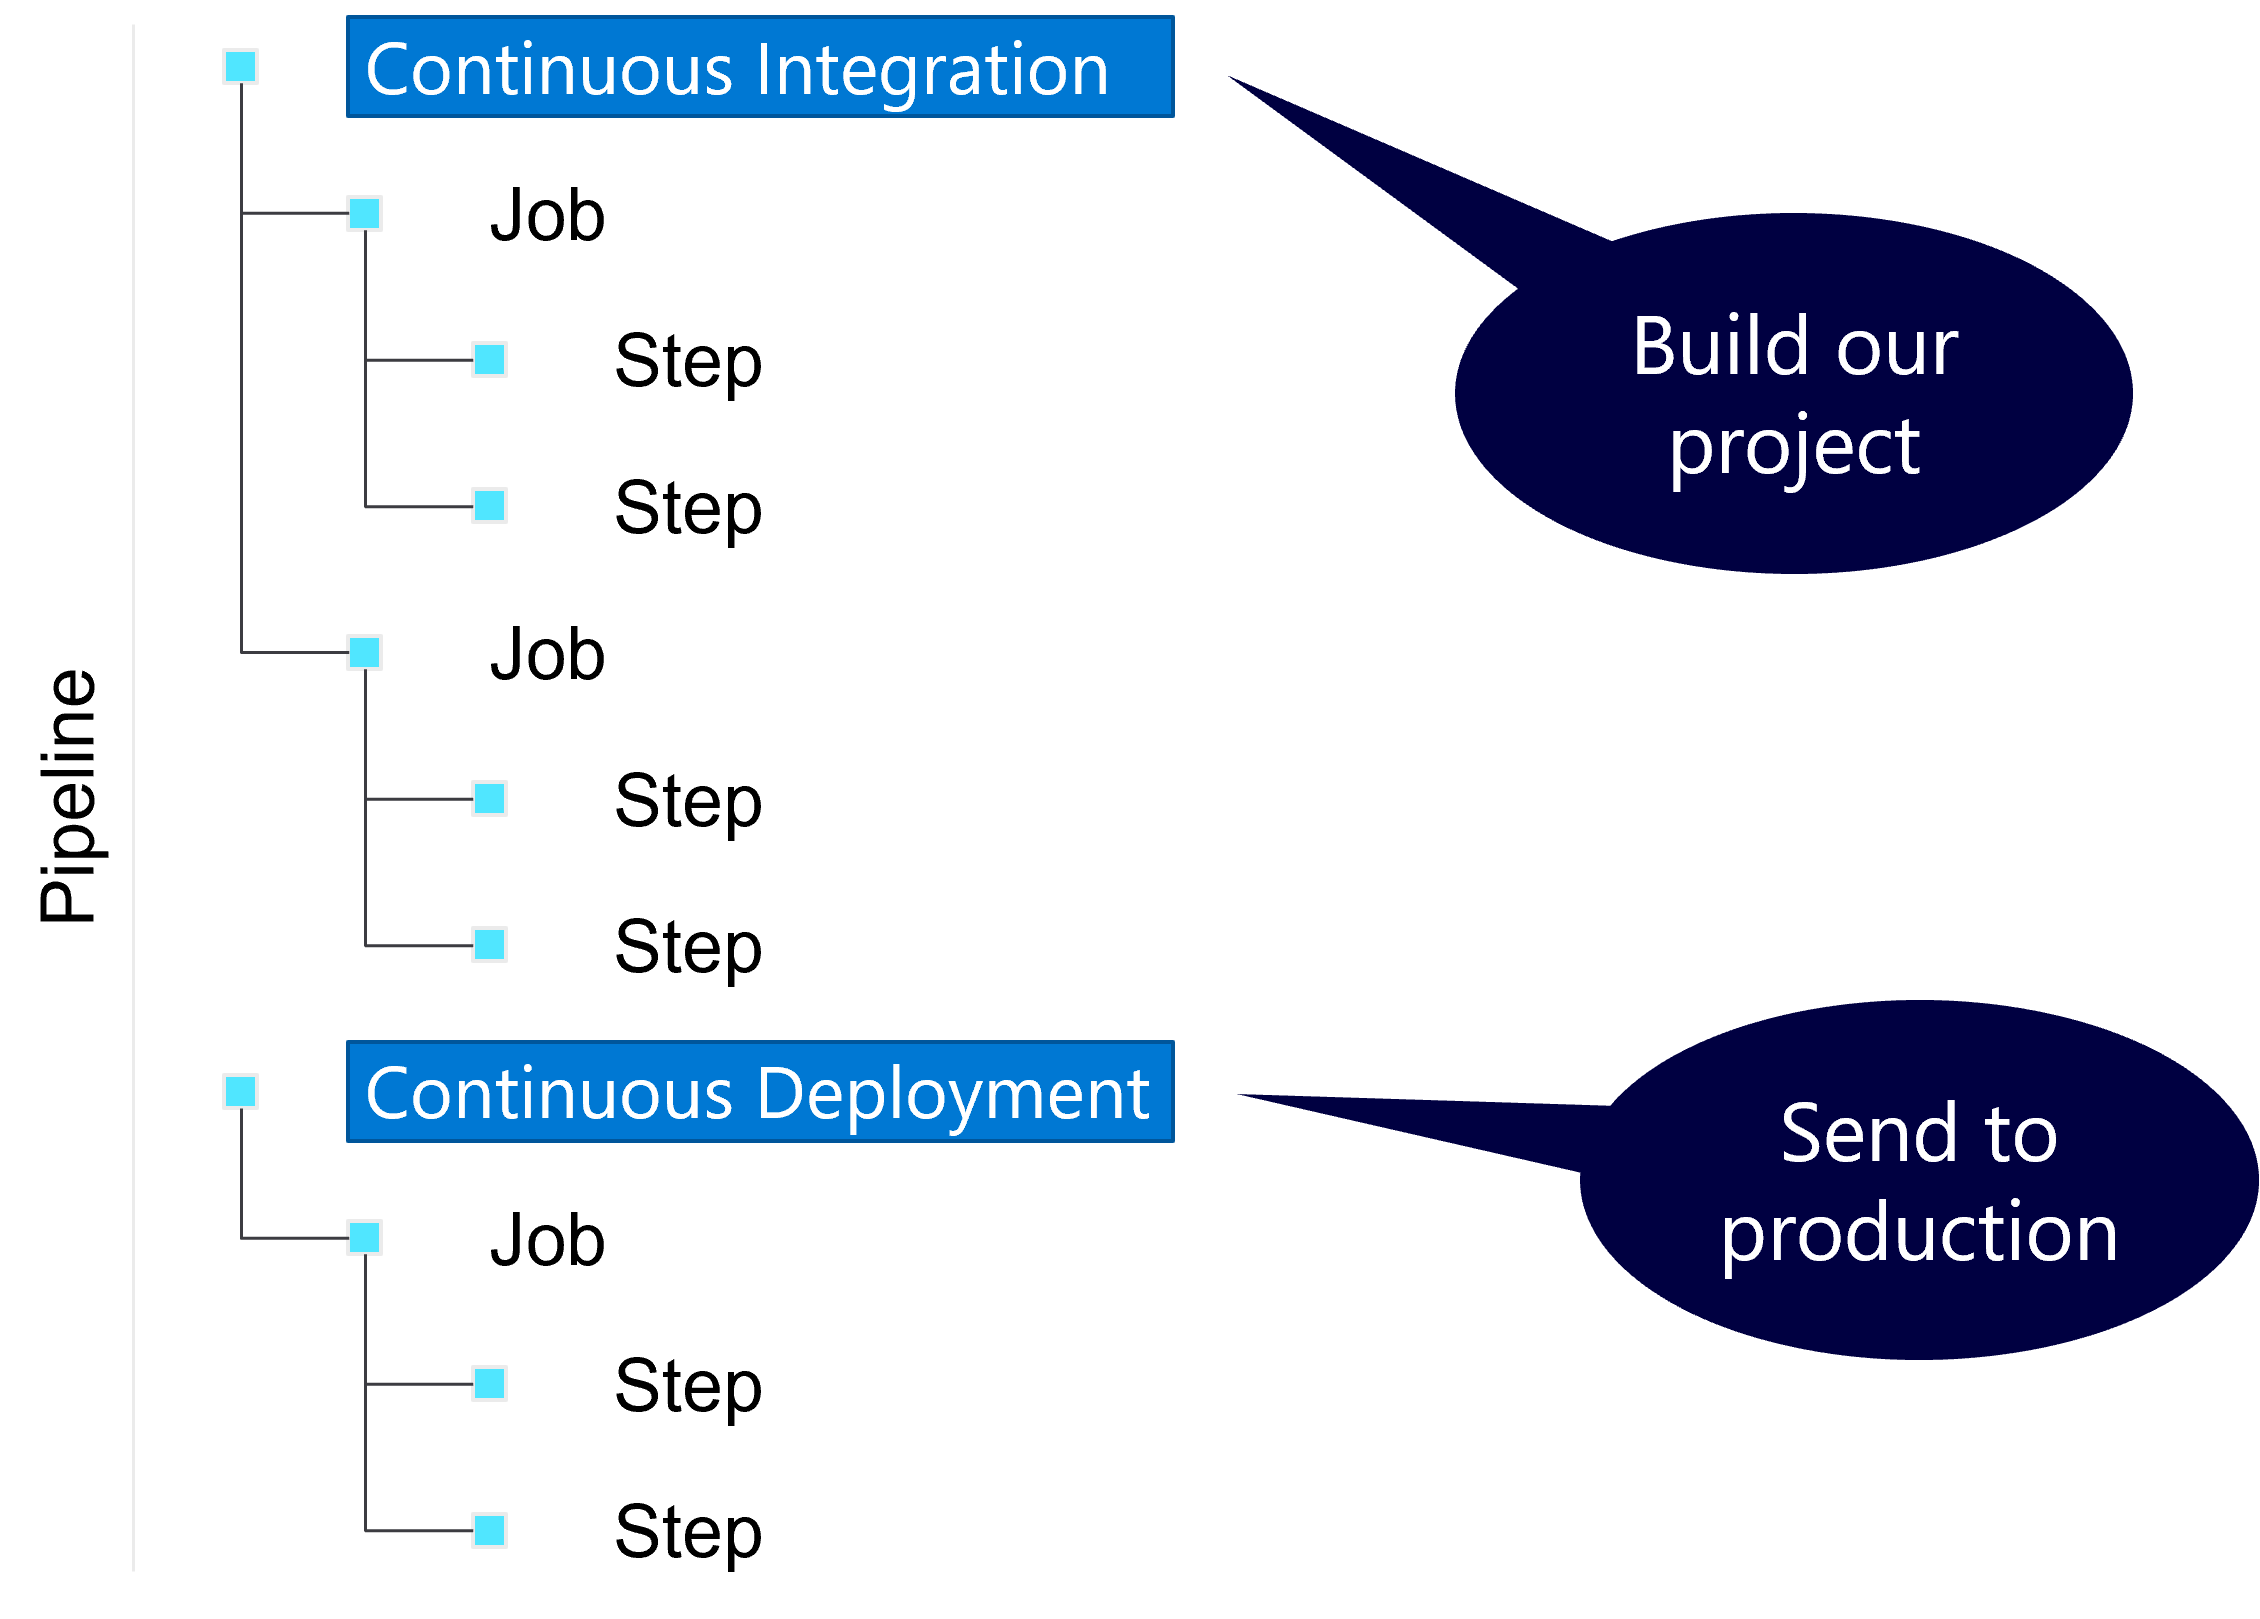
Pipeline hierarchy (again…)

Single stage pipeline
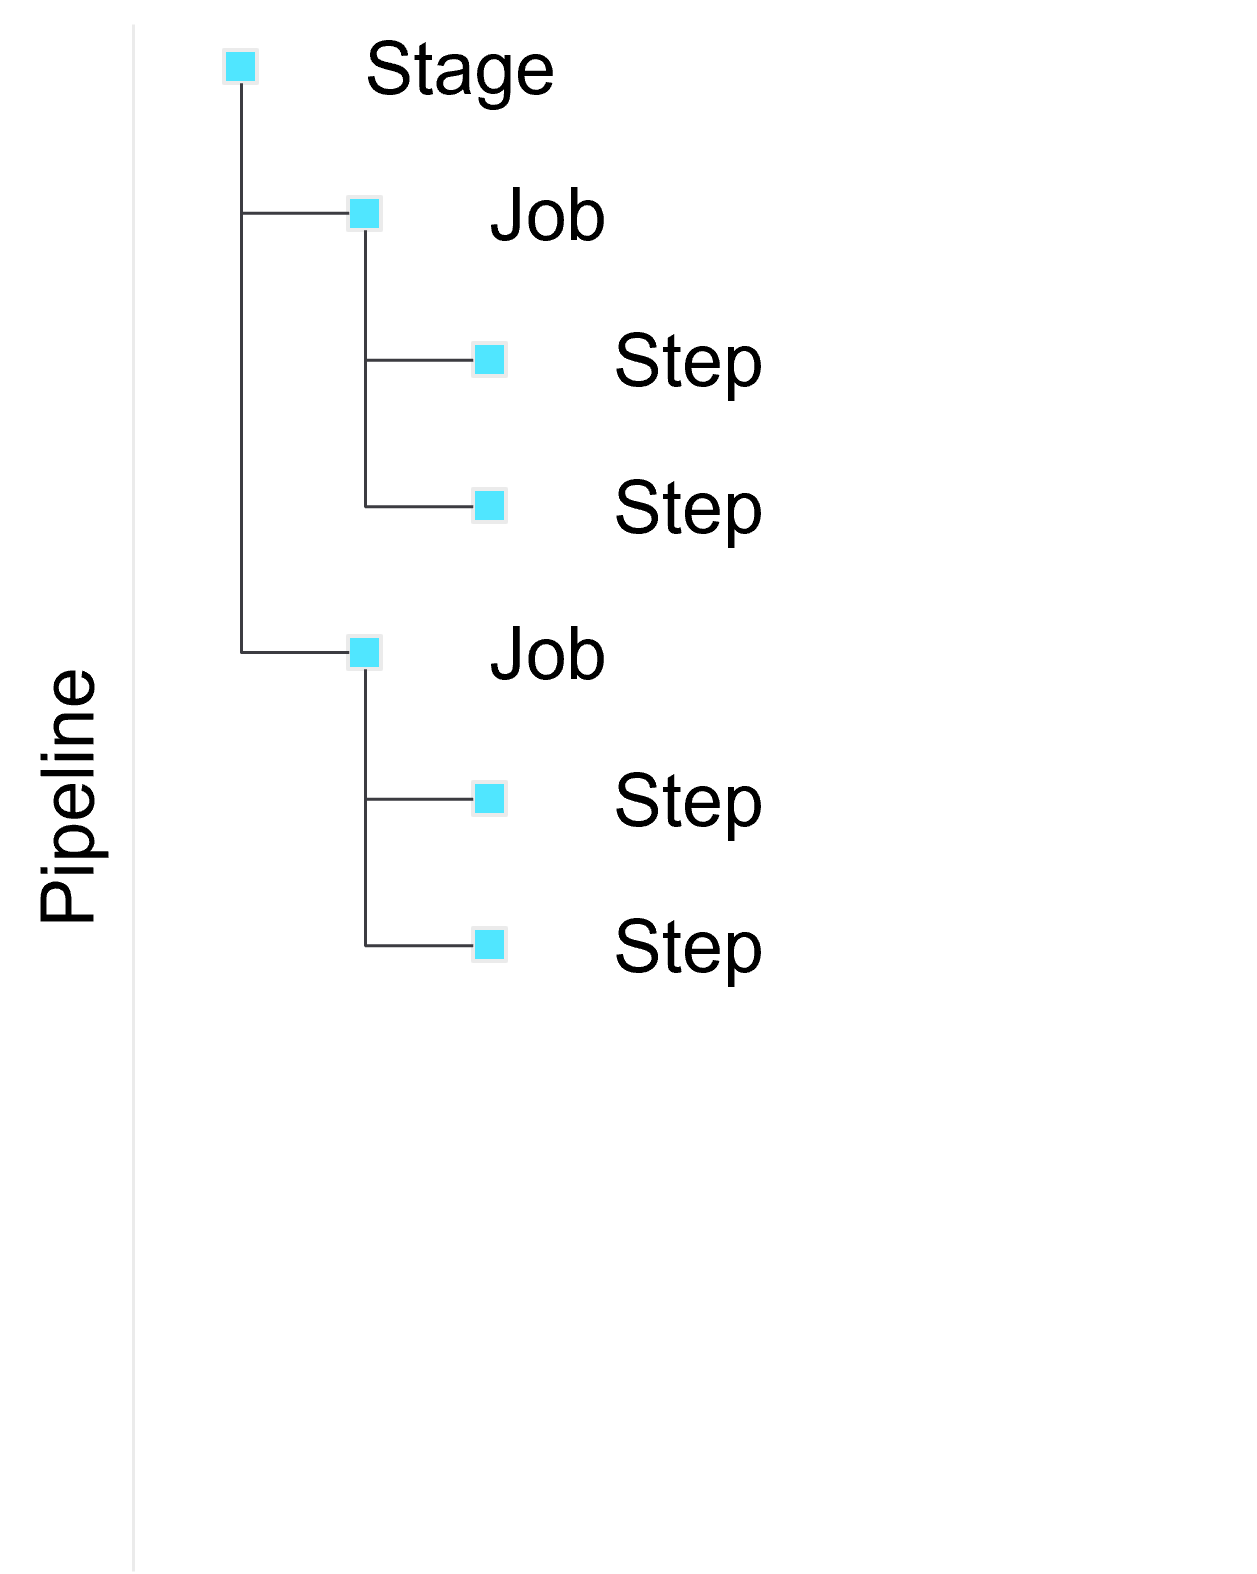
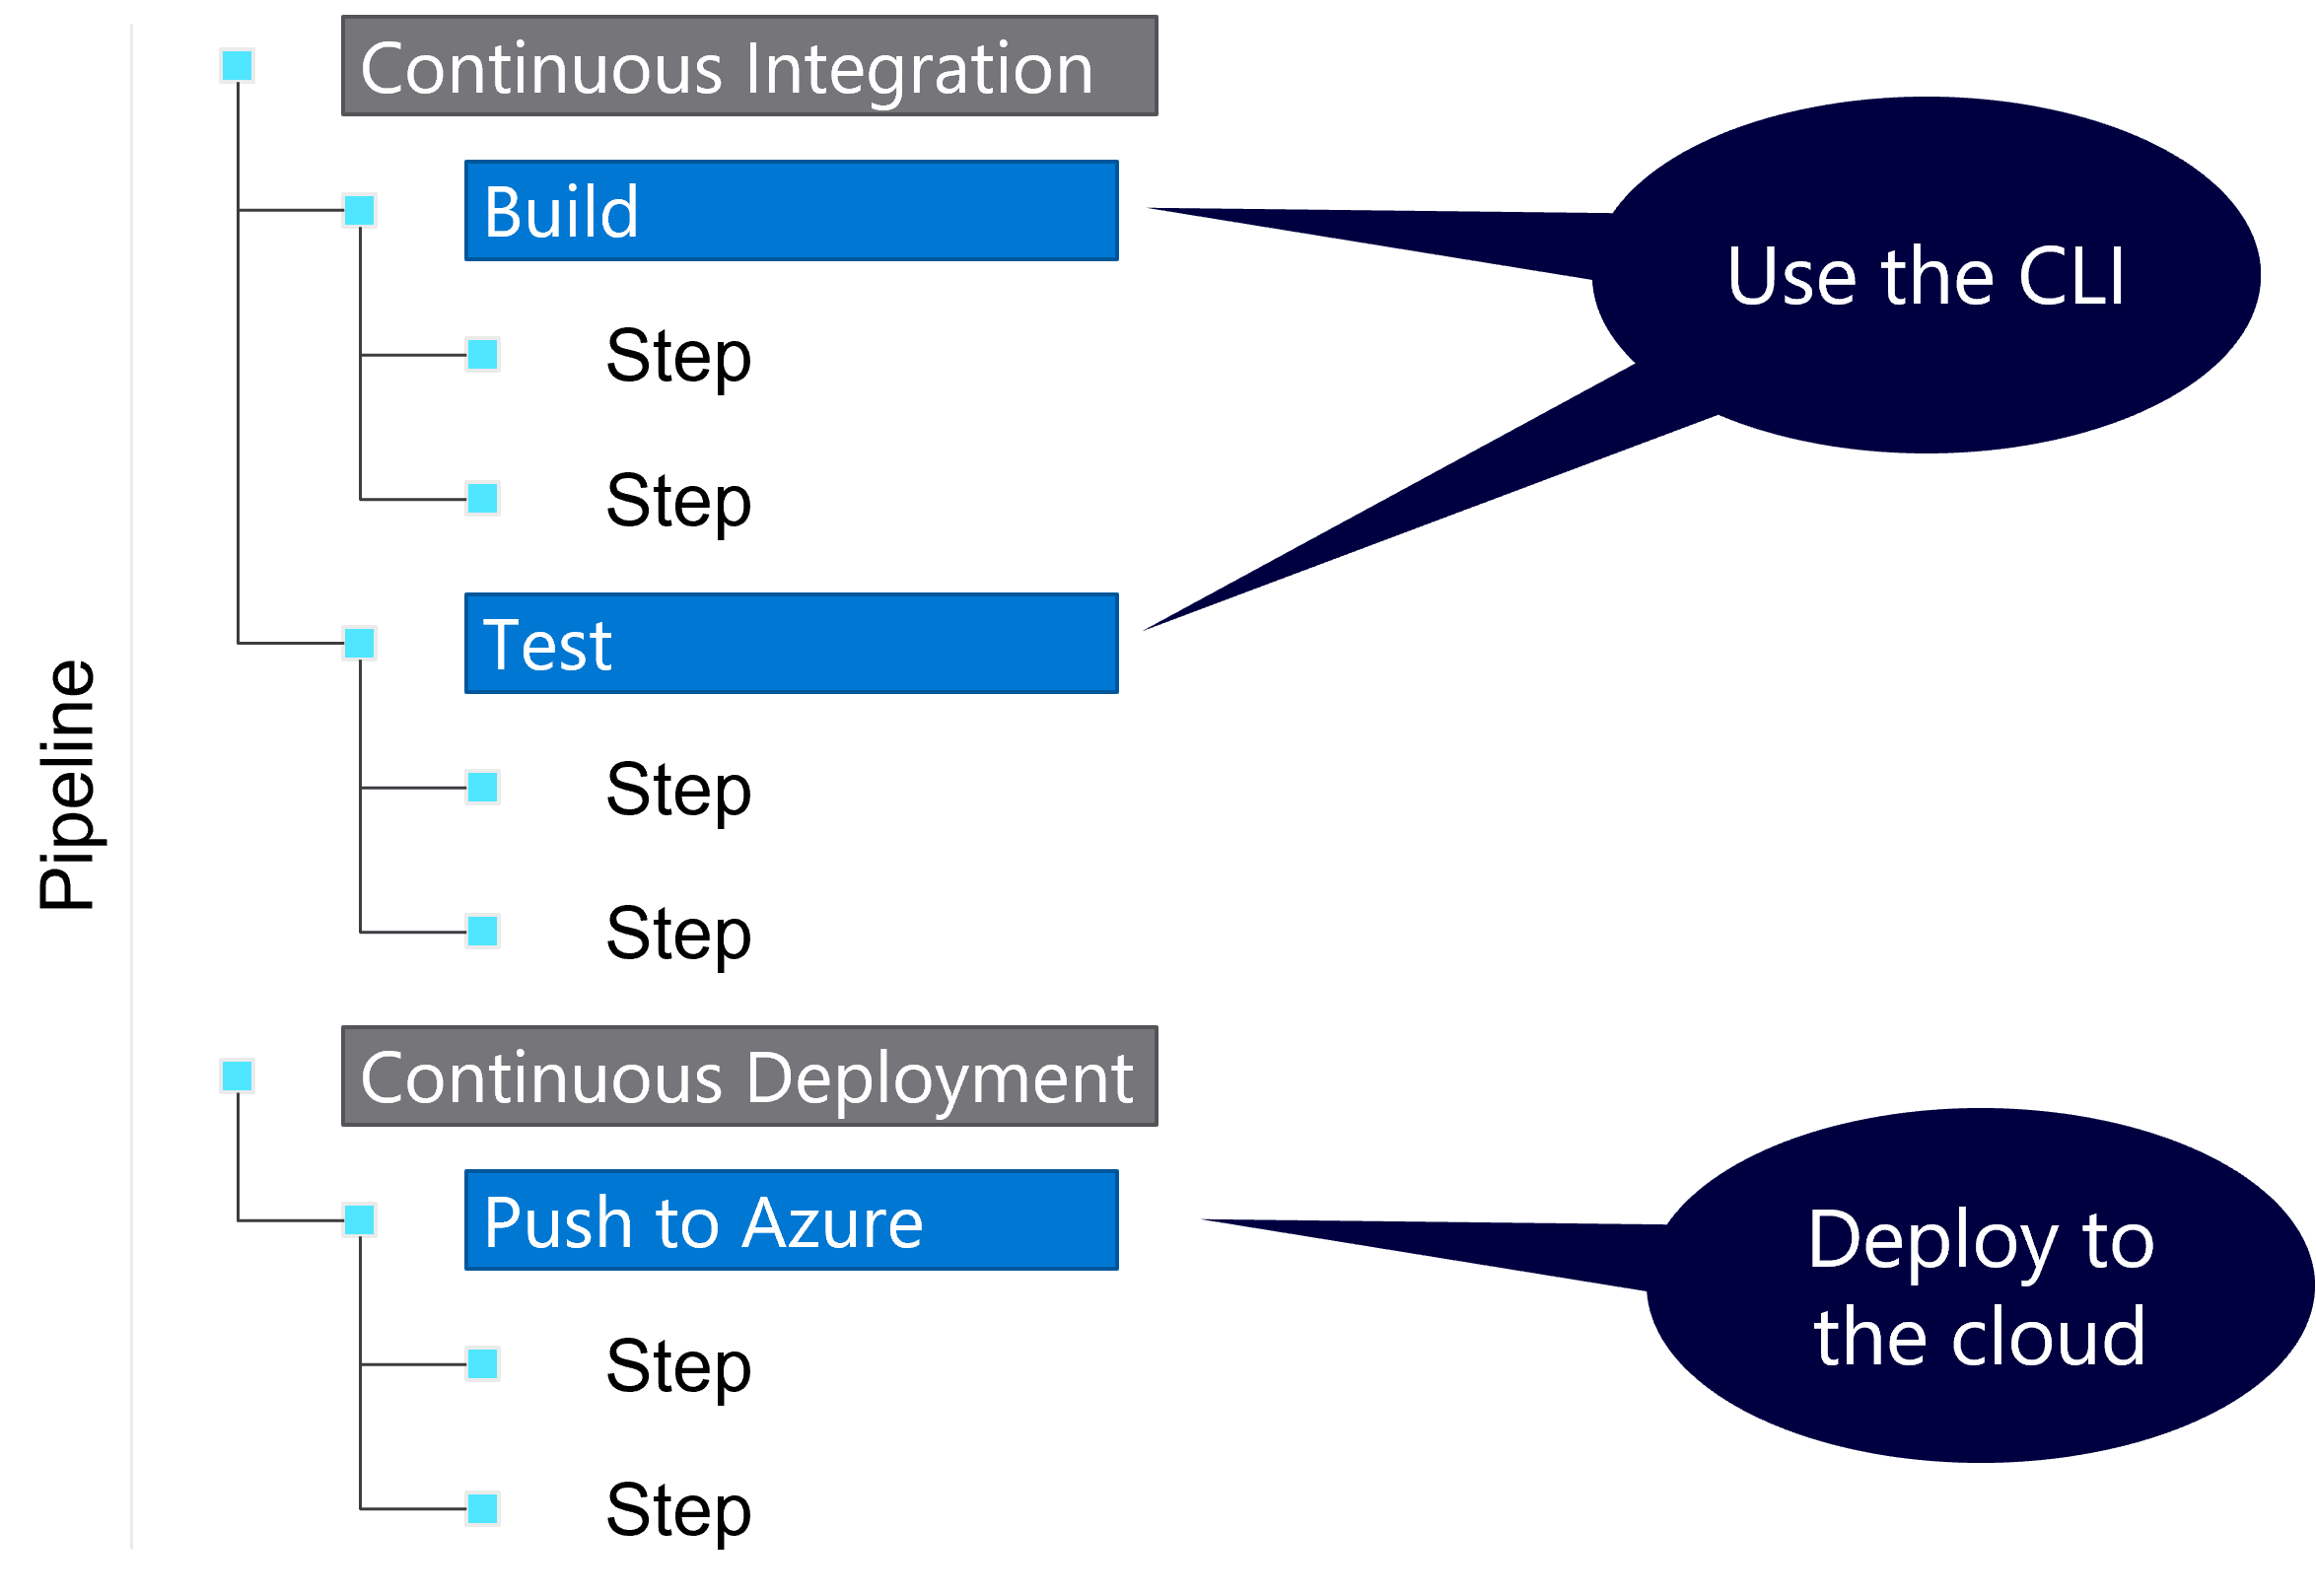
Build and test pipeline
Information from the developer team
| Language | Install required packages | Run application |
|---|---|---|
| .NET | dotnet restore |
dotnet run |
| Node.js | npm install |
node [file.js] |
| Python | pip install [package] |
python [file.py] |
| Ruby | gem install [package] |
ruby [file.rb] |
.NET guidance from the developers
| .NET CLI | |
|---|---|
| Install packages | dotnet restore |
| Build project | dotnet build |
| Run project | dotnet run |
| Test project | dotnet test |
| Publish project | dotnet publish |
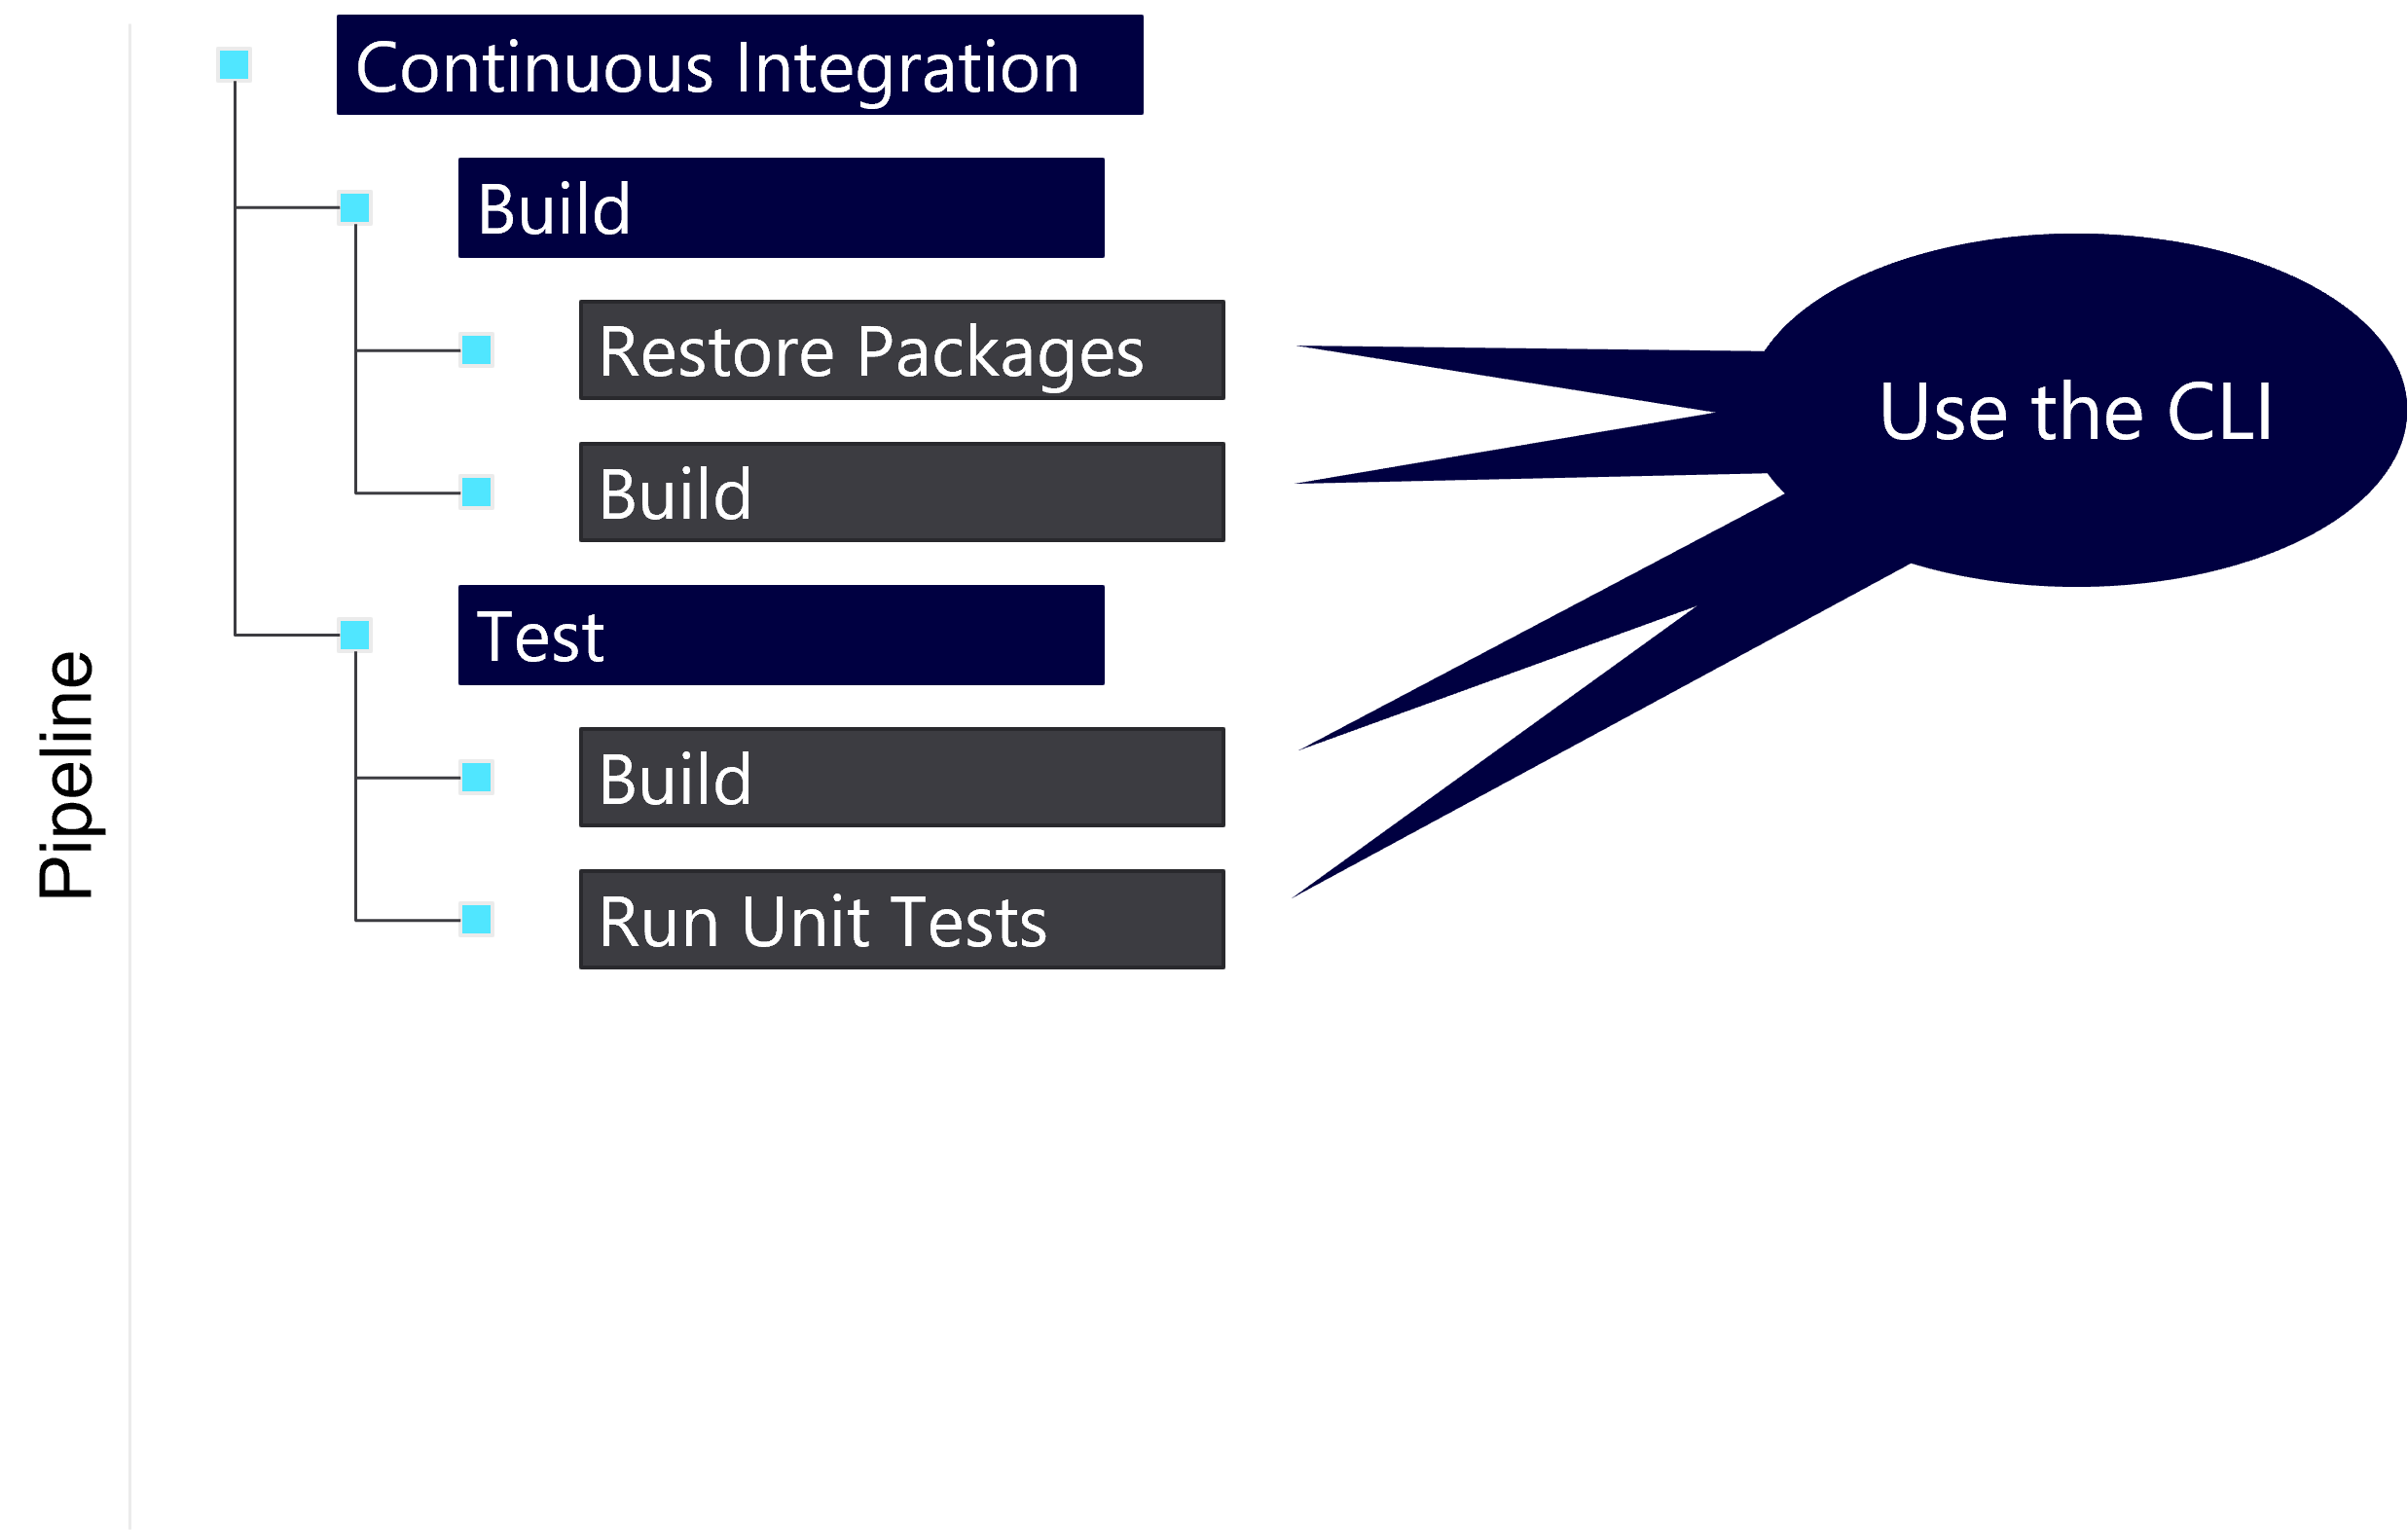
Build and test pipeline (again…)

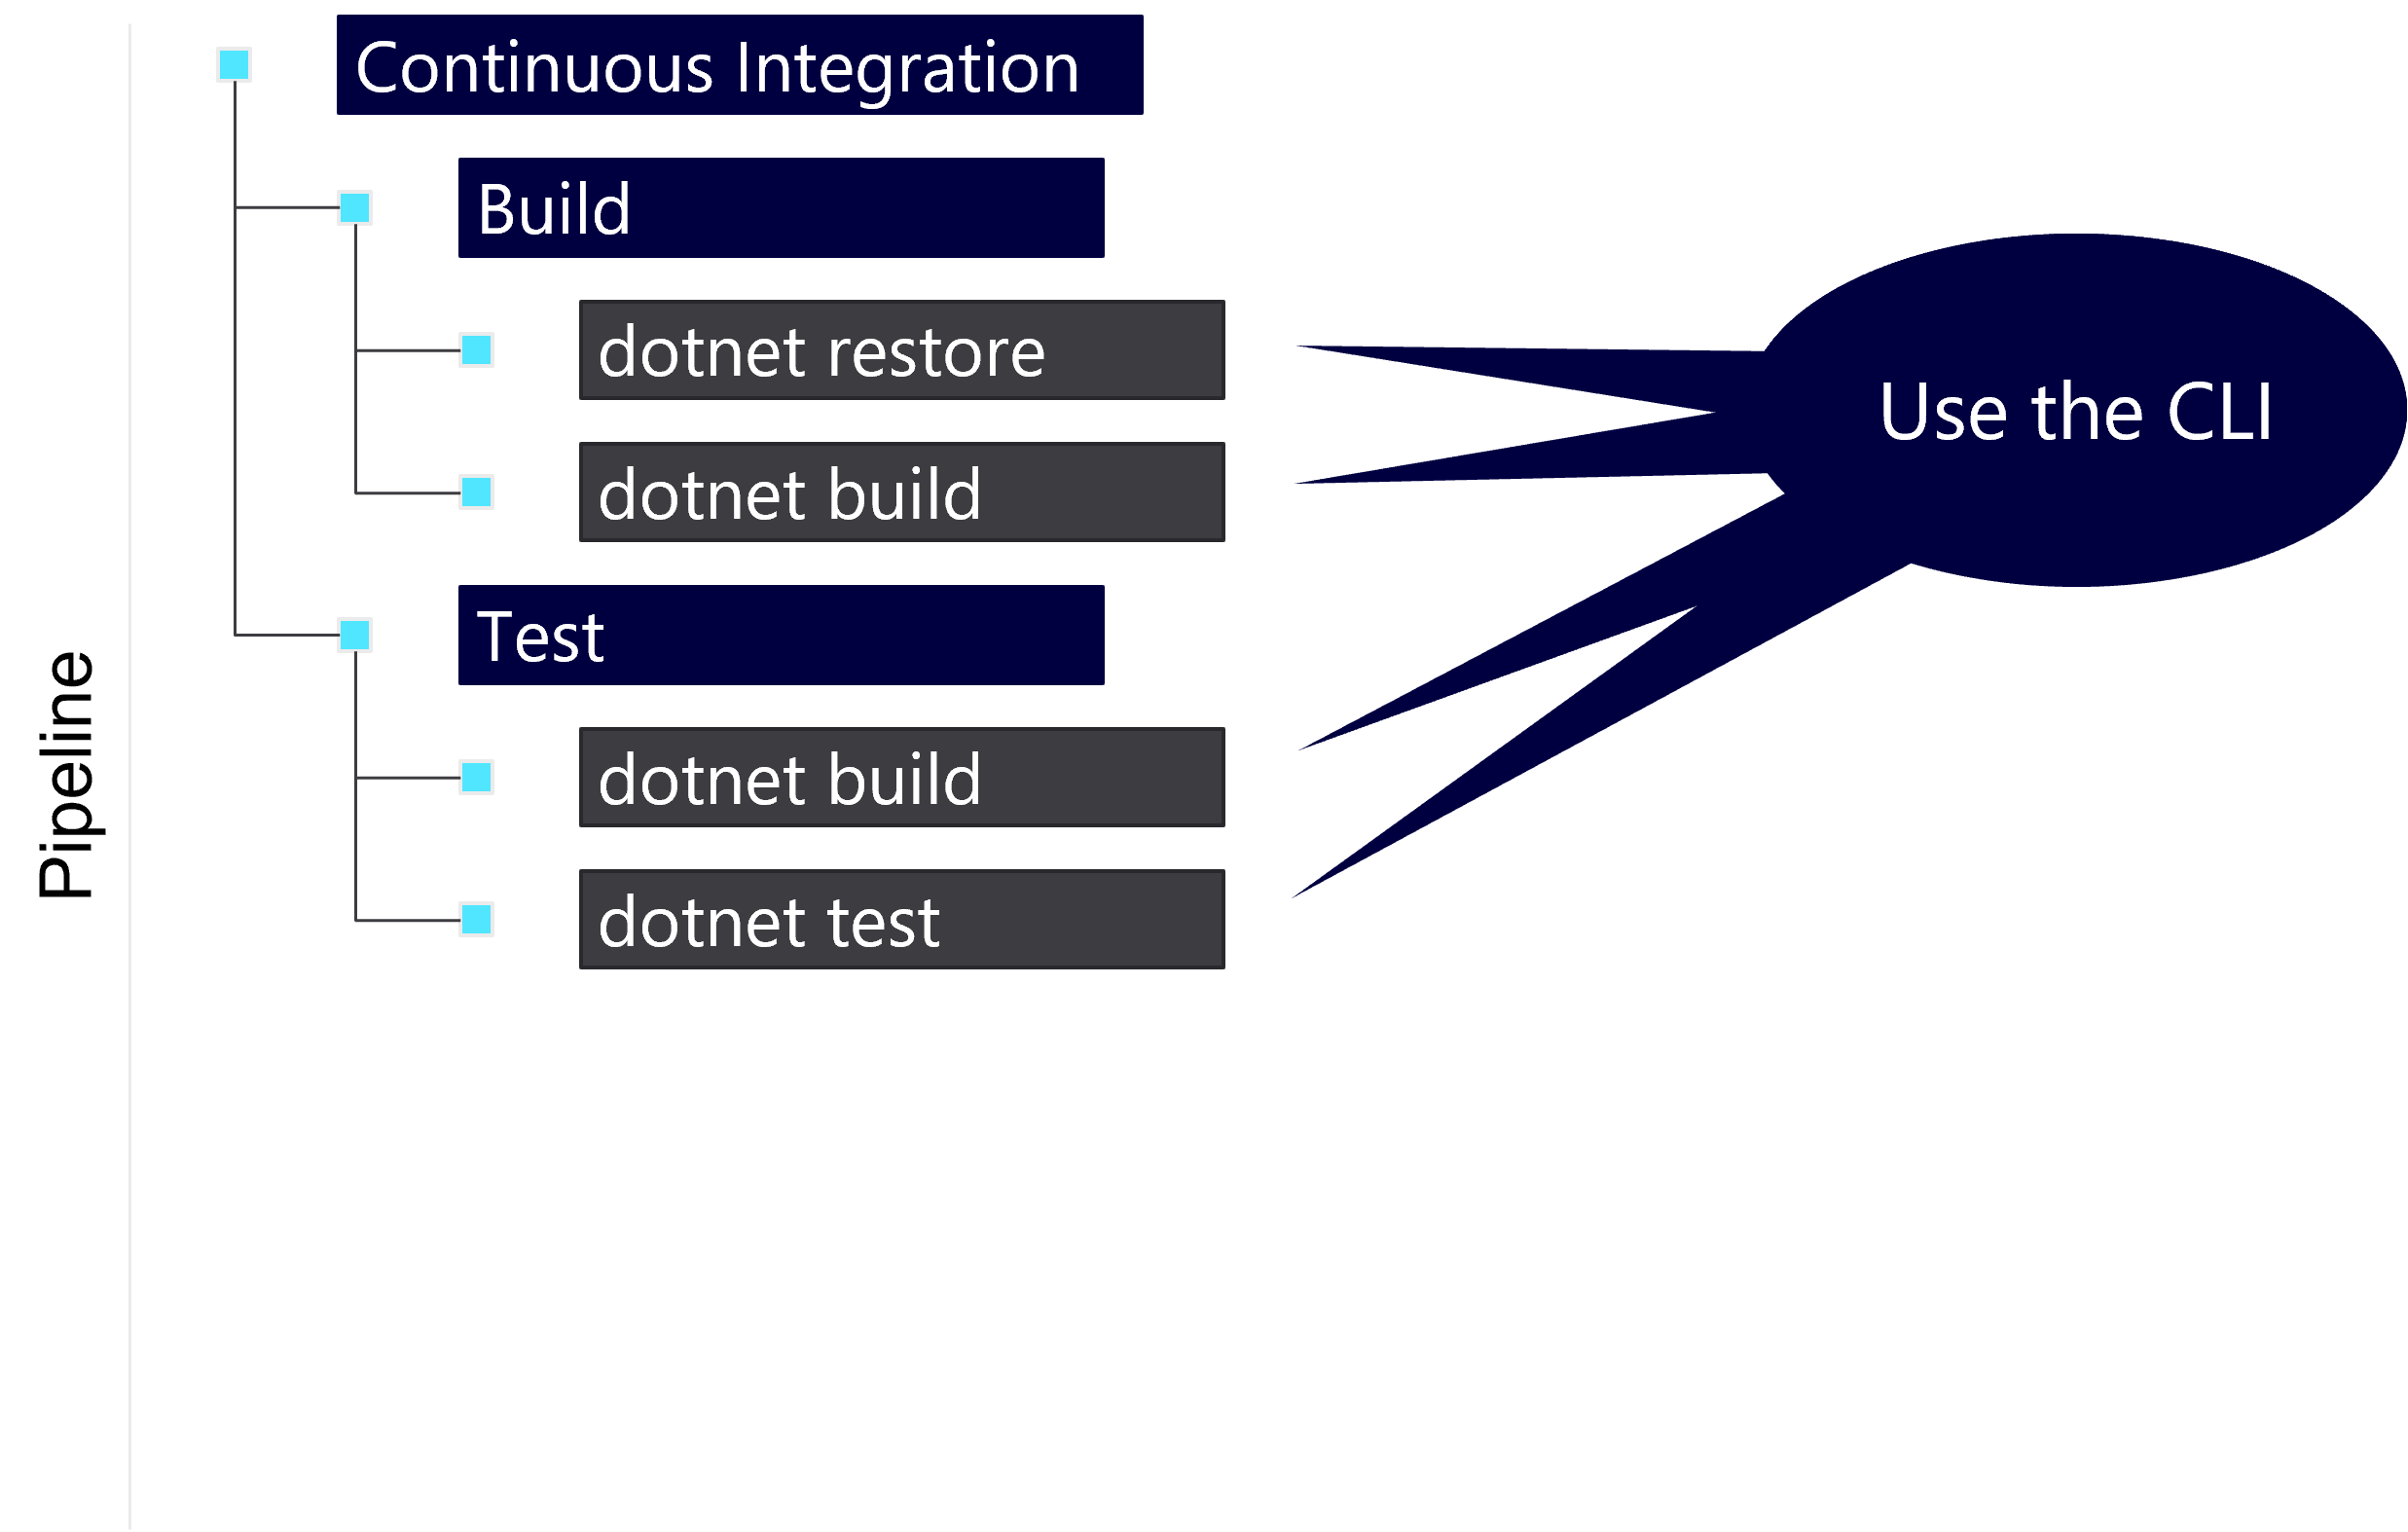
Use the CLI in the pipeline
Start with your stages keyword
stages:
Then, the stages array
stages:
- stage: <name_of_stage>
- stage: <name_of_stage>
Name each stage
stages:
- stage: continuous_integration
Next, the jobs keyword
stages:
- stage: continuous_integration
  jobs:
Then add jobs
stages:
- stage: continuous_integration
  jobs:
  - job: <job_name>
  - job: <job_name>
Now, name each job
stages:
- stage: continuous_integration
  jobs:
  - job: build
Finally, add the steps keyword to the job
stages:
- stage: continuous_integration
  jobs:
  - job: build
    steps:
Reviewing, the types of steps
Script
- Run any command-line script
- Example:
dotnet build
Task
- Run one of the built-in complex tasks
- Example:
- Create an Artifact
Steps can be scripts or tasks
stages:
- stage: continuous_integration
  jobs:
  - job: build
    steps:
    - script: <some_script_to_execute>
    - task: <name_of_builtin_task>
Remembering the word from the developers
Restore .NET packages from NuGet
dotnet restore
Build .NET project
dotnet build
Build and restore a .NET project
stages:
- stage: continuous_integration
  jobs:
  - job: build
    steps:
    - script: dotnet restore
    - script: dotnet build
Demo: Building a .NET project using a pipeline
::: notes
-
Return to the GitHub project.
-
Remove every file in the project except for the following three files:
- <name-of-project-folder>.csproj
- Program.cs
- .gitignore
-
Create a new pipeline YAML file in your project.
Note: The filename of the pipeline is arbitrary. For the remainder of the demos, we will assume you named the pipeline pipeline.yml.
-
Add the following content to the pipeline YAML file:
stages: - stage: continuous_integration jobs: - job: build steps: - script: dotnet restore - script: dotnet build -
Commit your changes to the local repository and push the changes to GitHub.
-
Return to the Azure DevOps project.
-
Create, save, and then run a new pipeline with the following settings:
- Source: GitHub
- Repository: Select GitHub repository you created earlier
- Template: Existing Azure Pipelines YAML file
- Branch: main
- Path: /pipeline.yml
-
Observe the job output logs.
-
Update the content of the pipeline YAML file:
stages: - stage: continuous_integration jobs: - job: build steps: - script: dotnet --version - script: dotnet restore - script: dotnet build - script: dotnet run -
Commit your changes to the local repository and push the changes to GitHub.
-
Return to the Azure DevOps project and your new pipeline.
-
Observe the job output logs for the latest automated run.
:::
Hard-coded names
| Task | Name |
|---|---|
| Single Stage | continuous_integration |
| Single Job | build |
Script (dotnet restore) |
CmdLine |
Script (dotnet build) |
CmdLine |
Implementing display names
stages:
- stage: continuous_integration
  displayName: Continuous Integration
  jobs:
  - job: build
    displayName: Build
    steps:
    - script: dotnet restore
      displayName: Restore NuGet packages
Demo: Creating friendly names
::: notes
-
Return to the GitHub project.
-
Update the content of the pipeline YAML file:
stages: - stage: continuous_integration displayName: Continuous Integration jobs: - job: build displayName: Build steps: - script: dotnet --version displayName: Check .NET SDK version - script: dotnet restore displayName: Restore NuGet packages - script: dotnet build displayName: Build .NET project - script: dotnet run displayName: Run .NET application -
Commit your changes to the local repository and push the changes to GitHub.
-
Return to the Azure DevOps project and your pipeline.
-
Observe the job output logs for the latest automated run.
:::
Microsoft-hosted agents
| Image | Specification |
|---|---|
| Windows Server 2022 & Visual Studio 2022 | windows-2022 |
| Windows Server 2019 & Visual Studio 2019 | windows-latest or windows-2019 |
| Ubuntu 20.04 | ubuntu-latest or ubuntu-20.04 |
| Ubuntu 18.04 | ubuntu-18.04 |
| macOS 11 Big Sur | macOS-latest or macOS-11 |
| macOS X Catalina 10.15 | macOS-10.15 |
Included software examples (ubuntu-latest)
- Ansible
- Azure CLI
- Docker
- .NET SDK
- Git
- Helm
- Node.js
- Terraform
- Python
Specifying a pipeline agent pool
pool:
  vmImage: ubuntu-latest
stages:
- stage: continuous_integration
  jobs:
  - job: build
    steps:
    - script: dotnet build
      displayName: Build .NET project
Specifying a job container
pool:
  vmImage: ubuntu-latest
stages:
- stage: continuous_integration
  jobs:
  - job: build
    container: mcr.microsoft.com/dotnet/sdk:latest
    steps:
    - script: dotnet build
Demo: Switching to a .NET 6 container
::: notes
-
Return to the GitHub project.
-
Update the content of the pipeline YAML file:
pool: vmImage: ubuntu-20.04 stages: - stage: continuous_integration displayName: Continuous Integration jobs: - job: build displayName: Build container: mcr.microsoft.com/dotnet/sdk:6.0 steps: - script: dotnet --version displayName: Check .NET SDK version - script: dotnet restore displayName: Restore NuGet packages - script: dotnet build displayName: Build .NET project - script: dotnet run displayName: Run .NET application -
Commit your changes to the local repository and push the changes to GitHub.
-
Return to the Azure DevOps project and your pipeline.
-
Observe the job output logs for the latest automated run.
:::
Reviewing today’s session
- Azure Pipelines
- YAML syntax
- Building projects
Reference Links
- https://azure.com/pipelines
- https://docs.microsoft.com/azure/devops/pipelines/yaml-schema
- https://github.com/features/codespaces